
Language
Views: 0 Author: Site Editor Publish Time: 2026-06-21 Origin: Site


Night hunters frequently face a difficult choice. They want to add thermal capabilities to their rifles. However, they refuse to sacrifice their daytime optic's perfect zero. Superior glass quality and reticle familiarity matter immensely. You rely on muscle memory when taking a crucial shot in complete darkness. A clip-on thermal night vision system perfectly solves this dilemma. It bridges the crucial gap between dedicated daytime setups and heavy dedicated night rigs.
Successfully integrating these systems requires rigorous attention to detail. You must address two critical failure points before entering the woods. First, mechanical mounting stability is vital. This prevents disastrous Point of Impact shifts. Second, you must understand realistic thermal detection metrics. This moves you past inflated marketing claims. It reveals your actual identification ranges in the field. We will explore how to mount, evaluate, and deploy these advanced optics properly.
Mounting dictates accuracy: Choosing between an objective bell collet and an extended Picatinny rail mount fundamentally impacts zero retention and recoil management.
Detection ≠ Identification: A "2,000-yard detection range" often translates to a 300-yard positive identification range under real-world hunting conditions.
Base magnification limits: Thermal clip-ons perform best when paired with day scopes operating at 2x to 6x base magnification; higher magnification results in severe pixelation.
Weight penalties: Adding a thermal unit significantly alters rifle balance, requiring adjustments to shooting positions and tripod setups.
Hunters debate equipment choices endlessly. A common argument pits dedicated thermal scopes against clip-on units. Swapping dedicated scopes often destroys your carefully established zero. This forces you to buy heavy, specialized quick-detach mounts. Even then, returning to absolute zero is rarely guaranteed. You waste expensive ammunition confirming your zero before every night hunt.
A hunting scope clip-on provides a much smarter alternative. It aligns perfectly with practical field needs. It allows you to utilize your existing high-end glass. You keep your familiar reticles. Your carefully calibrated ballistic turrets remain unchanged. This approach transforms a standard hunting rifle into a highly capable 24-hour system. You avoid relearning complex digital reticle menus in the dark.
We must objectively analyze the specific trade-offs between dedicated and clip-on systems.
You retain your primary day scope zero perfectly.
You keep your zero-learning-curve physical reticle.
You enjoy incredibly fast transitions from day hunting to night hunting.
You add significant forward weight to the rifle muzzle.
You accept a slight optical compromise. You are looking at a digital screen through curved optical glass.
You rely heavily on absolute optical alignment to hit your target accurately.
Mounting methods dictate your downrange accuracy. A poorly mounted device ruins hunts and injures animals. Let us examine the two primary mounting standards available today.
The mechanism is relatively simple. A custom collet clamps directly onto the objective bell of your day scope. You tighten it using a specialized lever or screw system.
This method offers distinct advantages. It requires no additional rail space on your rifle. This fits traditional bolt-action hunting rifles perfectly. It allows for fast attachment and removal in the field.
However, real risks exist. The heavy unit puts notable stress on the day scope's main tube during heavy recoil. Misalignment happens easily if you ignore specific torque specs. It also requires exact outer diameter measurements. You must measure your scope bell with digital calipers. A mismatch of just one millimeter ruins the grip.
This mechanism differs completely. It mounts to an extended forward rail. This might be an AR-15 handguard or a specialized chassis night vision bridge.
This standard offers massive structural benefits. It isolates the day scope entirely. The day scope absorbs none of the thermal unit's physical weight. It ignores the recoil inertia of the attachment. It proves mechanically superior for heavy calibers like .300 Win Mag.
The risks are mostly logistical. You need a specialized rifle chassis. You might need extended forward rails. It absolutely necessitates precise optical axis height alignment. Your rail height must perfectly match your day scope ring height. Misaligned heights cause immediate optical distortion.
Comparison of Clip-On Mounting Standards | |||
Mounting Style | Primary Advantage | Primary Risk | Best Suited For |
|---|---|---|---|
Objective Bell Adapter | No extra rail space required | Stresses scope tube under recoil | Traditional bolt-action rifles |
In-Line Rail Mount | Zero stress on day optic | Requires precise height alignment | AR-platforms and chassis rifles |
We must address a persistent industry myth. Many claim a thermal imaging attachment requires absolutely "no zero." They argue the reticle remains safely inside the day scope. Theoretically, this sounds correct. Practically, it is false.
Minute optical collimation errors inside the clip-on induce Point of Impact shifts. The digital display might sit fractionally off-center from your scope's optical axis. Adding two pounds to your barrel also changes barrel harmonics. Verification at the range is mandatory. Never mount a unit and immediately go hunting. Always shoot a test group to confirm impact.
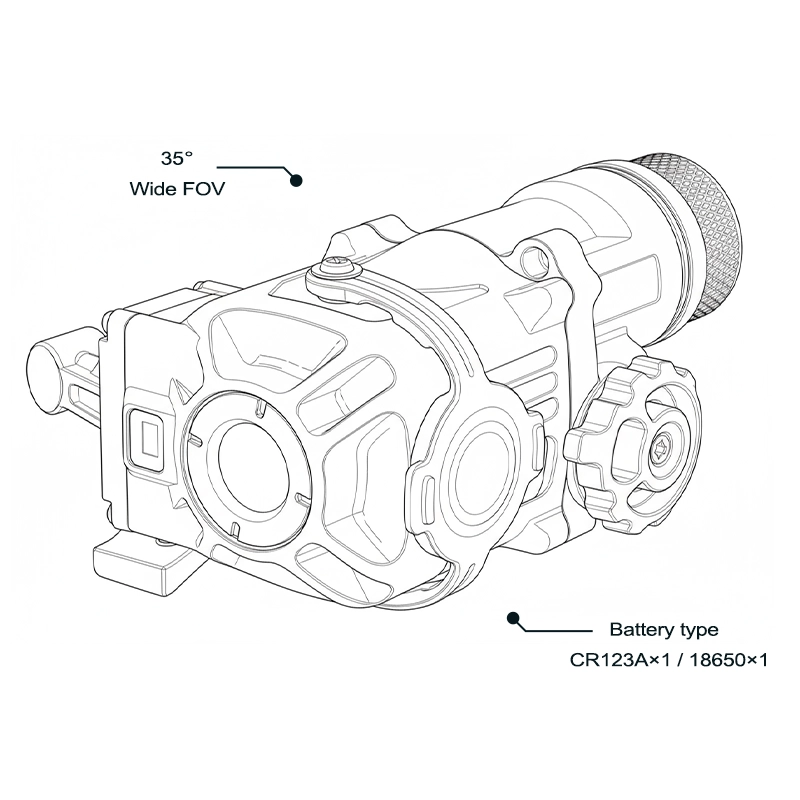
Marketing claims often contradict field physics. Manufacturers frequently boast about massive detection ranges. We must break down why a raw "detection range" proves highly unreliable for ethical hunting. A 2,000-yard detection range rarely means you can take a 2,000-yard shot.
The military uses Johnson's Criteria to evaluate thermal performance. It remains the gold standard for setting realistic expectations.
Detection: This requires 1.5 pixels on target. You only see a warm anomaly. It looks like a glowing dot. This is useful for locating a heat source. It is never enough for shooting.
Recognition: This requires 6 pixels across the target. You can distinguish an animal from a warm rock. You know it has four legs instead of two.
Identification: This demands 12 or more pixels. You can confirm the specific species. You determine its exact orientation. You can finally tell a wild coyote from a domestic dog safely.
Several hardware components dictate your true identification distance. You must understand these specifications.
Compare a 384x288 sensor to a 640x480 sensor. Pixel pitch also matters heavily. A 12µm pitch crowds pixels closer together than a 17µm pitch. Higher pixel density dictates your maximum identification distance. More pixels mean a sharper image at longer ranges.
Noise Equivalent Temperature Difference (NETD) measures thermal sensitivity. A sub-25mK rating matters immensely. It helps separate a target from its background in high humidity. Foggy environments lower temperature variance drastically. Better NETD cuts through this thermal noise efficiently.
Objective lenses gather the thermal data. A 35mm lens offers a wider field of view. A 50mm lens provides higher base magnification. The 50mm lens pushes your identification range further out. It sacrifices your wider view to achieve this.
You must understand the "Screen Door" effect. Your day scope is simply magnifying a tiny digital micro-display inside the clip-on housing. It does not magically see through the thermal sensor. It looks directly at a pixelated screen.
Your day scope's base magnification dictates the system's success. The ideal day scope base magnification sits between 2x and 4x. Some systems tolerate up to 6x.
You hit a severe failure point if you push past this. Pushing a day scope past 8x or 10x drastically shrinks your Field of View. It also heavily pixelates the thermal image. The screen pixels become massive, blurry blocks. This renders the system completely unusable for tracking moving targets. You will lose an animal in the brush instantly.
You are managing two distinct focal planes. This confuses many new users initially. First, you must focus the clip-on NV imager objective lens. This focuses the thermal sensor on the target's physical distance. Second, you must use your day scope's parallax adjustment. This resolves the day scope reticle onto the thermal unit's internal screen. Failing to stage these focuses correctly guarantees a blurry, unusable image.
Selecting the right unit requires an honest assessment of your hunting environment. You must buy for the terrain you hunt most frequently.
We can break down selection into two primary field scenarios.
A 384x288 sensor is perfectly adequate here. A 35mm lens works best. An objective bell mount proves sufficient for lighter recoiling rifles. You should prioritize a wide Field of View. This helps track close, fast-moving targets easily.
You need a 640x480 sensor for open terrain. A 50mm lens is necessary for reach. A rigid in-line rail mount becomes mandatory for stability. You must prioritize high resolution and the lowest possible NETD rating. This ensures clear identification at a distance.
Verify your local hunting regulations strictly. Night vision and thermal optics face heavy restrictions in some jurisdictions. Confirm legality before finalizing your equipment budget. Do not risk severe poaching charges over simple ignorance. Regulations change frequently across state and county lines.
Follow these steps before buying a rifle scope thermal device:
Verify your objective bell outer diameter precisely with calipers. If using a rail, verify height alignment.
Confirm your day scope base magnification is low enough. If it starts at 6x, you need a different day optic.
Calculate the total system weight. Order appropriate support gear like a heavy-duty carbon fiber tripod or bipod.
Clip-on thermal night vision provides unparalleled modularity for modern hunters. It transforms your trusted daytime setup without ruining your established zero. However, it demands rigorous mechanical setup. You must maintain realistic expectations regarding actual identification ranges versus advertised detection ranges.
Always prioritize flawless optical alignment. Invest in higher sensor quality over raw, inflated distance metrics. Secure your mounting system properly. Finally, always confirm your physical zero at the range with the unit attached prior to any hunt. A verified zero ensures ethical, precise shots every time.
A: Theoretically no, because the reticle remains in the day scope. Practically, yes. You must verify your zero. Slight optical misalignment within the clip-on can shift your impact. Furthermore, adding significant weight to your barrel alters barrel harmonics. Always confirm your Point of Impact at the range before hunting.
A: Yes. Thermal sensors detect heat signatures, not visible light. Bright daylight will not damage the internal sensor. However, using them during the day is generally unnecessary. The exception is spotting heavily camouflaged targets hidden deep in thick brush where standard glass fails.
A: This is usually caused by too much day-scope magnification, which pixelates the internal digital display. It also stems from improper focus staging. You must first focus the day scope onto the thermal screen using the parallax knob. Then, focus the thermal objective lens on the physical target.
A: A rail mount is mechanically superior. It isolates the day scope entirely from the thermal unit's weight and recoil inertia. Objective mounts are very convenient and fast. However, they can stress the day scope tube under heavy recoil, potentially causing zero shift or optical damage.


